


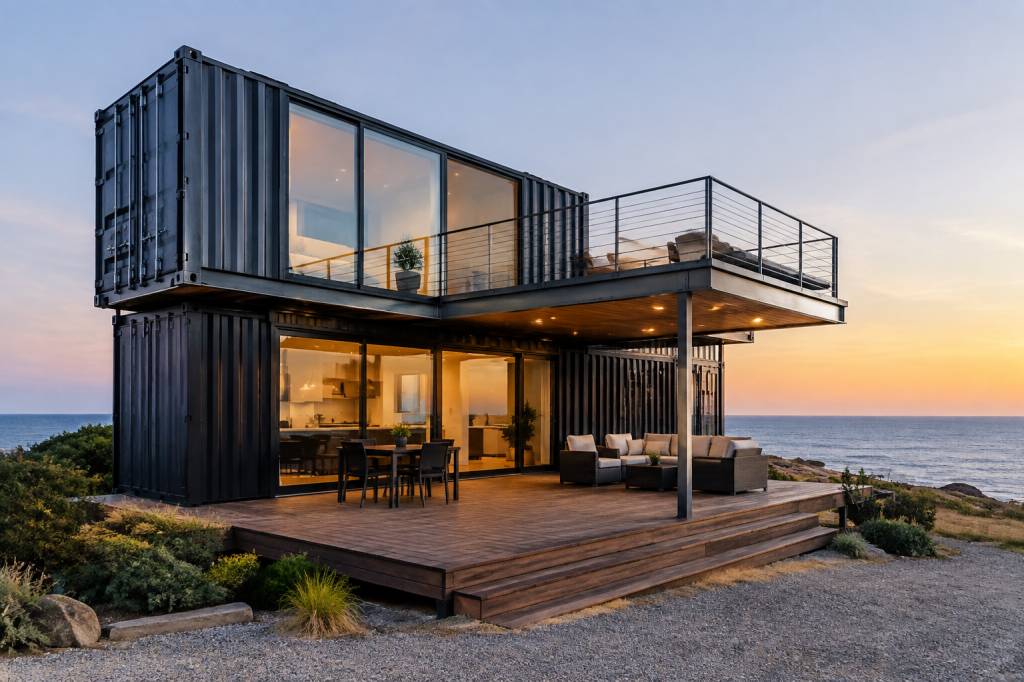
Sea container buildings are no longer limited to temporary site offices or experimental architecture projects. Across Europe, North America and Australia, retired shipping containers are being converted into homes, offices, classrooms, hospitality units and emergency accommodation. The attraction is easy to understand: the main structure already exists, the dimensions are standardized, and a container can often be delivered to a site faster than a conventional building shell.
But a steel box is not automatically a good building. It is designed to carry cargo, resist stacking forces and survive a demanding marine environment—not to provide daylight, ventilation, thermal comfort or a healthy indoor climate. The quality of a container project therefore depends less on the novelty of the concept than on the design decisions made after delivery.
This guide examines the practical issues: container selection, architectural planning, structural modifications, insulation, materials, services, costs and construction risks.
Start with the container, not the floor plan
The most common units are 20-foot and 40-foot dry freight containers. A standard 20-foot container is approximately 6.06 metres long, 2.44 metres wide and 2.59 metres high externally. A 40-foot unit has the same width and height but is approximately 12.19 metres long. Internal dimensions are smaller because of the steel walls, corner posts, doors and floor construction.
High-cube containers add useful headroom. Their external height is approximately 2.90 metres, giving an internal height close to 2.70 metres before insulation and finishes. That extra 30 centimetres can make a significant difference once the ceiling build-up is installed.
Before choosing a unit, check the following points:
-
Condition: inspect the roof, corner posts, floor and door frames for corrosion, impact damage or deformation.
-
History: ask whether the container carried chemicals, food products or hazardous materials.
-
Floor treatment: many container floors are made from plywood treated with insecticides or preservatives. The treatment must be identified before the floor is retained indoors.
-
Doors and seals: damaged seals can allow water infiltration, while stiff or distorted doors indicate structural problems.
-
Certification: a container that has lost its original shipping certification may still be suitable for construction, but it should be assessed for its new purpose.
“One-trip” containers are often advertised as nearly new. They may have made only one journey, but that does not remove the need for inspection. A used container with surface rust can be more economical than a new unit if the corrosion is superficial and the frame remains straight. Conversely, a cheap container with damaged corner posts can create expensive structural work later.
Designing around a rigid structural grid
Container architecture works best when the design respects the original frame. The primary load-bearing elements are the four corner posts, the top and bottom side rails, and the end frames. The corrugated side panels contribute to the enclosure, but they should not be treated as an unlimited structural resource once large openings have been cut.
Open-plan interiors are possible, but removing a long side wall or an entire end wall usually requires steel reinforcement. New beams, box sections or portal frames may be needed to transfer loads around the opening. This work should be designed and checked by a structural engineer, particularly where containers are stacked or connected to foundations.
A simple single-container studio may require only carefully positioned windows and doors. A larger dwelling made from several units is more complex. The junctions between containers must be weatherproofed, structurally connected and detailed to accommodate movement. Water has a habit of finding the smallest weakness in a roof seam, and a container junction offers several opportunities for leakage if it is treated as an afterthought.
Good planning usually separates the project into clear zones:
-
Living areas: place them along the best-lit façades and provide cross-ventilation wherever possible.
-
Service areas: bathrooms, kitchens and utility rooms can be grouped to reduce plumbing runs.
-
Circulation: avoid wasting the narrow internal width on oversized corridors.
-
Plant and storage: mechanical equipment, electrical panels and water heaters need accessible spaces.
-
Outdoor space: courtyards, decks and covered walkways can make a compact container plan feel considerably larger.
One important design question is whether the container should remain visible. Exposed corrugated steel can create a strong industrial character, but it also demands careful attention to thermal bridging, condensation and corrosion. A cladding system may provide better long-term performance while preserving the container as the structural core.
Insulation is the central technical issue
A steel wall has very poor thermal resistance compared with a properly insulated timber or masonry wall. Steel also conducts heat rapidly. Without a continuous insulation strategy, a container can become excessively hot in summer, cold in winter and vulnerable to internal condensation.
The first decision is whether to insulate from the inside or outside.
Internal insulation is usually cheaper and simpler. Studs or service battens can be installed inside the container, followed by mineral wool, rigid boards or spray-applied insulation. The drawback is loss of floor area. In a 2.44-metre-wide container, an internal build-up of 100 to 150 millimetres on both side walls can reduce the usable width by roughly 200 to 300 millimetres. That is considerable in a narrow room.
External insulation preserves internal space and reduces thermal bridges through the steel frame. It can be combined with a ventilated rainscreen, timber cladding, fibre-cement panels or metal siding. The construction is more extensive, however, and the final appearance may no longer show much of the original container.
Common insulation materials include:
-
Mineral wool: non-combustible, relatively easy to install and useful for acoustic control. It requires a well-designed vapour and airtightness strategy.
-
Rigid PIR or phenolic boards: high thermal performance for limited thickness, but joints must be carefully sealed and fire performance must be checked.
-
Polyurethane spray foam: conforms well to corrugated surfaces and can reduce air leakage. Installation quality, chemical emissions, fire classification and future repair access require careful review.
-
Wood-fibre boards: renewable and vapour-open, with good summer heat performance. They require sufficient thickness and protection from moisture.
-
Cellulose: suitable within a properly designed framed wall, although it cannot simply be blown into an unprotected steel cavity.
The floor is often overlooked. A container floor may sit above the foundations, but it remains exposed to cold air and wind. Insulating below the floor can improve comfort without sacrificing internal width. The roof also needs attention: a dark steel roof exposed to direct sun can create extreme heat gains unless it is insulated, shaded or replaced by a ventilated roof build-up.
Mechanical ventilation should be planned alongside insulation. A highly airtight container without controlled ventilation can develop high humidity and poor indoor air quality. In cold climates, mechanical ventilation with heat recovery may be justified, especially in compact homes with bathrooms and kitchens concentrated in a small volume.
Windows, doors and solar control
Large glazed openings bring daylight into a container, but each opening weakens the original envelope and can affect the frame. Window and door locations should be finalized before cutting begins. The steel should be cut with suitable equipment, the opening reinforced where required, and the frame protected against corrosion.
Orientation matters. South-facing glazing can provide useful winter solar gains in the northern hemisphere, but it may cause overheating in summer. East and west façades are more difficult to shade because of low-angle sunlight. External blinds, deep roof overhangs, pergolas and deciduous planting are often more effective than internal curtains.
Using a container as a home does not mean accepting container-sized windows. The better approach is to combine controlled openings with a shaded terrace, courtyard or glazed link. This creates a relationship with the outside without turning the steel shell into a greenhouse.
Materials for the interior and exterior
Container interiors need materials that tolerate movement, humidity and intensive use. Moisture-resistant gypsum board, plywood, fibre-cement board and timber linings are common choices. The correct material depends on the room: kitchens and bathrooms require more robust moisture protection than bedrooms or offices.
For floors, engineered timber, linoleum, cork, ceramic tile and vinyl can all be used, provided the substrate is stable and level. Ceramic tiles require particular care because the container may flex during transport or installation. A decoupling layer and a suitable adhesive system can reduce cracking risks.
Exterior cladding should provide a ventilated cavity wherever the wall build-up requires drying. Timber, recycled plastic boards, fibre cement, aluminium and corrugated steel are all possible. The choice should consider fire regulations, maintenance, local climate and the building’s relationship with its surroundings—not only the initial price.
Reusing the original steel has an environmental benefit, but the full impact depends on transport, modifications, insulation, foundations and service life. A container transported hundreds of kilometres and heavily rebuilt may not automatically outperform a locally sourced conventional structural system. The sensible approach is to compare the complete building assembly, not just the reused box.
Foundations, lifting and site access
A container is strong at its corners, so foundations are commonly concentrated beneath the corner castings. Options include concrete pads, strip foundations, screw piles or a reinforced slab. The correct solution depends on soil conditions, frost depth, drainage, local regulations and the number of containers being stacked.
Site access is a practical constraint that is often discovered too late. A delivery truck needs sufficient road width, turning space and overhead clearance. A crane may be required to place the container over a wall, fence or existing structure. The cost of a short delivery can rise sharply if the site needs traffic management, a larger crane or temporary removal of obstacles.
Before ordering, confirm:
-
the truck route from the public road to the foundation;
-
the crane’s lifting radius and required ground bearing capacity;
-
the final container orientation, including door and window positions;
-
drainage and service connection points;
-
the tolerance of the foundation levels and anchor positions.
Once the units are placed, they should be anchored and connected according to the structural design. Stacking containers creates additional wind and seismic considerations. Twist-lock fittings may help connect units, but they do not replace an engineered load path.
Building services inside a steel shell
Electrical and plumbing routes should be coordinated before insulation and lining are installed. The narrow wall cavities make late changes expensive. Service battens can create a controlled zone for cables and pipes, reducing the risk of puncturing the airtight or vapour-control layers.
Bathrooms and kitchens should be positioned near each other when possible. Shorter drainage runs reduce falls, penetrations and maintenance issues. Water pipes located against an external steel wall need protection from freezing and condensation. Access panels are worthwhile for valves, pumps and filters; hiding every component behind a finished wall may look neat on day one and become frustrating later.
Fire safety must be addressed from the beginning. Steel is non-combustible, but insulation, timber linings, membranes, furniture and service penetrations are not. Fire resistance between stacked or adjacent units, escape windows, smoke detection and compartmentation are governed by local building regulations.
Cost, approvals and realistic expectations
The purchase price of an empty container is only one line in the budget. Structural cutting, reinforcement, insulation, windows, foundations, transport, crane hire, plumbing, electrical work, heating, ventilation, cladding and professional fees can represent the majority of the final cost.
A useful early budget should distinguish between:
-
Container and delivery;
-
Groundworks and foundations;
-
Structural modifications;
-
Envelope and insulation;
-
Internal finishes and fittings;
-
Mechanical and electrical systems;
-
Design, engineering, permits and contingency.
Planning permission and building approval vary by country and municipality. A container used as a permanent dwelling is generally treated as a building, even if it can technically be moved. Requirements may cover foundations, energy performance, fire safety, accessibility, stormwater, sanitation and structural stability.
The fastest projects are not necessarily the cheapest. Factory fabrication can improve quality control and reduce site time, but transport dimensions and crane access limit how much can be completed off-site. On-site fabrication offers flexibility but exposes the work to weather and coordination delays.
A practical decision checklist
Before committing to a sea container building, ask five direct questions:
-
Is the container genuinely suitable for reuse, with a clean and documented history?
-
Can the proposed insulation meet the local energy standard without making the rooms unacceptably narrow?
-
Have all structural openings, connections and stacking conditions been engineered?
-
Can the site accept delivery, lifting equipment, drainage and utility connections?
-
Does the complete project still make financial and environmental sense compared with other modular construction systems?
Sea container construction offers a useful combination of standardization, durability and architectural flexibility. Its limitations are equally clear: steel conducts heat, large openings require reinforcement, and compact dimensions leave little room for imprecise detailing. The strongest projects treat the container as one component in a complete building system—not as a shortcut around design, engineering or building regulations.
When the structure, insulation, ventilation, materials and site logistics are resolved together, the result can be efficient, distinctive and durable. When they are not, the finished building may simply be an expensive metal box with a very convincing marketing story.